Tag Archives: DIY

How to Build a Bookshelf for almost nothing

I was in an all too familiar of a situation and one I’d prefer to never be in again. I was broke, bored and had nothing to do except contemplate my situation. My room was a grotesque vision of toppling piles of books and dirty laundry that made you wish you were overlooking a murder scene. Action had to be taken, something had to be done.

My day had shifted and for a reason unknown making a bookshelf seemed like the perfect project to get through the afternoon.
A few cinder blocks would make the foundation and extra boards we had around the house would make perfect shelves. Since for many levels I was using half cinder blocks I used a wall as back support to keep the whole makeshift mess from falling over. After over 6 months of testing the bookshelf has stood up to everything a bookshelf can have thrown on it(sometimes literally) on top of being an impromptu workbench.

DIY Bookshelf

The Frankenstein's Monster of bookshelves, a makeshift bookshelf is an easy and practical way to recycle bad boards and leftover cinder blocks.

Overwintering: The Year Round Experience.

Black opal

I bought this African Blue Basil last year. After waiting for seeds to be produced for the entire summer, I learned that this plant is a hybrid and has the reproductive potential of two mules. With a little cloning this plant has lived on the last three months in my bedroom.

Looking out the window I can finally see the sun’s arch reach over the neighboring apartments, a signal of the approaching spring. Pretty soon gardeners all throughout the Northern Hemisphere will be elbows deep in dirt preparing for another year of foodstuffs.

This year, instead of heading to the nearest Home Depot for the cheapest seeds I can find, I’m utilizing one of the coolest concepts that I have heard of in a long time. I am buying my seeds from a company called Seed Savers Exchange(SSE).

So what I’m buying brand name seeds?

The Exchange realized that as agriculture become more standardized the plethora of seeds that were saved within families for generations were being lost.  The mechanical mass extinction event was taking place and the exchange felt it had to act. The company started an exchange based seed bank.  Members throughout the world share their seeds with the company and other members around the world. Through the organization members are encourage to either buy and sell with each other. SSE also sells to the general public although it only offers an sampled selection of the vast variety of seeds at their disposal.

The seeds they save are all heirlooms, meaning they have been reproduced continually for at least 50 years.  Although these seeds are going to prove to be more expensive than my old shopping habits, I’m going to be winning in the long run. Since all of these will be non-hybrid plants, the seeds will be viable for saving and hopefully regrowing next year.

This weeks step is to buy heirloom seeds.

Seed Savers Exchange

Digging In: Planting a small garden

Waging war against the menaces that have surrounded one of my jalapeno plants. The handy tool I'm using it call a hand hoe and has quickly become my favorite tool for the ground war against weeds.

After I cultivated the land and waited for what remained of the grass to die, the process of seeding began. The garden has been growing for nearly a month now so it’s probably a good time to describe the ways I started planting my future food.

There are two ways of trying to get food from a tiny seed that I use, direct sewing and transplanting.  It’s true that you can get food without ever having to get dirty via hydroponics but it’s not very cost effective and takes a lot of skill and know-how that I just don’t have.

A radish's eye view of the garden. I have never had luck transplanting any root vegetables. These are direct sown.

Direct sewing is by no means a technical term, it means putting the seed in the ground.  How deep you should plant the future food  depends on what your putting under. Depths usually range between 1/8 of an inch to an inch-and-a-half.

Transplanting takes a little more work but reaps greater benefits in the end. Instead of throwing your seeds into the ground, watering and hoping for the best, when you transplant you grow a small plant in controlled conditions before releasing them into the wild and murderous world that young plants struggle to survive in.

A plant that hasn’t yet been put into the garden is called a start-up.  To create a start-up you can either use the blister packs that they sell at places like home depot or dixie cups with holes cut into the bottom, to allow for drainage.  I’ve gone with both store bought and the cup method in my garden at home. After you have the container you need to fill it with potting soil, regular soil compacts and won’t let water drain properly.  After putting a few seeds in each container all the seeds need is regular watering and some time. Soon you’ll start having your own transplants ready without spending the $3 dollars they would cost at Lowe’s.

In order to keep the cost down, try buying seeds late in the season.  A lot of seed packets get discounted once summer starts and if you wait a little longer you can buy cheap start-ups too.  We bought a flat of jalapenos and bell peppers for a dollar because the owner of the local feed store was tired of taking care of them.

Another way to avoid seed costs is to split the price of seeds with someone else.  I almost never use all of the seeds in a packet, my operation is too small to plant everything.  This year a friend, Aaron and me started trading seeds with each other.  I ended up with a lot of new plants without spending any extra money.  Sometimes when someone has an abundance and I have nothing, I’ve just asked for seeds they won’t use and I’ve gotten them.  Why waste them when someone else could use them?  My personal feeling is that if you take, though, you should also give, as a result I like to share the harvest with whoever helped contribute.

For a garden map I planted stakes into the ground and then made a small map showing what is planted at which stake. Simple but effective.

Either way you choose to plant, a few things are good to remember, I learned them both by forgetting.  When I planted my first garden I forgot to leave space to walk between the rows. As a result I ended up killing more than a couple of plants by stomping around like a drunk ballerina, ironically I was trying to avoid stepping on anything.  My kale and tomato plants would testify to this if they were still here.

Another thing I like to do is keep records of what I have planted and where.  Record keeping will help avoid plucking up your good plants when you’re trying to weed out the bad.  I’ve found that keeping track of when I planted and when I harvested is also extremely helpful.  The expected harvest dates on the back of seed packages are only estimates and depending on your soil and location only experience seems to be able to tell how soon something is going to be be popping up.

Coming up: Weeding and the best tools for waging the ground war.

Weekly step update #1

This is the first check-in about my progress on the trail to living a sustainable life.   These are the changes that I have pledged to make so far and this is how well I’ve been keeping with them.

My "green canteen" isn't the only stainless steel container in the house. My aunt and uncle purchased these because before all they were using was plastic bottles and eventually they decided to get away from leaching plastics.

No more plastic bottles:

I have been doing good on this front.  Soon after taking on the challenge I realized that I didn’t buy that many water bottles anyway, my family is a different story.  Ultimately I decided to swear off all plastic bottles in general.  Recently it’s come to my notice that instead of going with plastic when I stop into a 7-11 what my hands end up latching onto is usually a can or glass bottles.  I’m going to have to do a little research to find out if this is actually progress towards reducing my impact on the earth, or if I’d have to give up glass and aluminum to make a real difference.

Watch labels and avoid foods with the chemicals calcium chloride and calcium disodium EDTA.

When I came up with this step I was having severe stomach problems and starting to move towards an sustainably farmed food diet.  Both of these chemicals are known to be associated with stomach problems in high doses and they are both preservatives, like arsenic used to be.

I have started to read labels due to a gluten allergy I recently found out I have, but I have slipped more then a couple of times on eating calcium disodium EDTA and calcium chloride which sneaks into more foods then you’d suspect.  Tonight I ate Calcium disodium EDTA in Italian salad dressing.  I didn’t read the label until after eating.  The horseradish sauce from Arby’s also contains the chemical.

No Coffee from large chain stores:
Calypso Coffee

So far I have been able to accomplish this goal completely.  In the town I’m currently there are no coffee shops, just diners.  In downtown Knoxville I have discovered a few coffee shops that are locally owned and on the farm everything we drink is made from grounds bought at Ingles.  I’m stilling sipping down the coffee purchased from Calypso Coffee in Coeur d’Alene Idaho.  It still taste like sweet nectar in comparison to anything I’ve been able to drink since.  To ensure that coffee stays fresh you can put it in the freezer until grinding and when you brew it up, it will be almost as good as it was when you left the shop.

Planting a garden:
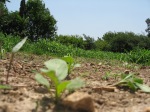
A radish eye's view of the garden.

I’m still in the process of starting my garden but proactive steps are being taken.  The garden I planted earlier this year is being managed by my mom back in Oregon until I get back.  Out here the lettuce and arugula aren’t making but radishes and spinach have survived the scorching sun and are living well.  Today we purchased a flat of peppers from the feed store in town for $1.  These are all healthy plants.  When we went in to buy feed, the owner said we could get em for half off.  Shortly after that he changed his mind, and said we could take the whole bunch for a buck, he wanted to get rid of them. This is another reason why I like to shop at locally owned businesses.  If someone made this type of deal for us at Lowe’s or Home Depot they would be fired, but locally owned shops give you a personal experience with the owners and often this deal works out in everyone’s favors.

New step towards sustainability for the week: Learn to can food.

I’m actually really excited about this step.  Canning my own food has been something I’ve wanted to do for some time now and I’m finally at a place where it’s possible.  After shopping around a bit I was able to find out where to get the cheapest canning supplies in town.  In my quest for finding the cheapest canning supplies I searched the nearby Farmers CO-OP, K-Mart, a local hardware store and Ingles.  Between all the shops prices ranged from $8.49 to 9.99 for pints and $8.99-10.99.  The ultimate winner in the battle of the prices was Ingles with Pints at $8.49 and quarts at $8.99.

My aunt started canning last year and this year I have already made a few attempts but none have been what I would call completely successful.  What I’ve learned is that canning is a safe business when precautions are taken.  If corners are cut too short though consequences can be deadly.

Our recent forray into the world of canning involved packing 14 quarts of pickles. Unfortunately all the lids didn't seal, so we're going to be eating a lot of pickles this week.

Canning becomes a sustainable concept because durring in many areas the options of local food drops off.  If buying food locally and seasonally, canning can extend the time your eating home grown green beans from a couple months to year-round.  Not only is canning a good choice to keep healthy, local food around but after you get past the start-up costs canning is as expensive as buy jar lids.

Storing food isn’t only for the individual looking to spend hours in the kitchen, however.

One simple way to keep cucumbers fresh for a long time is to wait until a jar of pickles runs out but keep this juice and container.  If you add a new batch of cucumbers to the brine and leave the mix in the fridge after about a week you’ll find another batch of crisp fresh pickles just waiting to be consumed.

Digging In: Cultivating for a small garden.

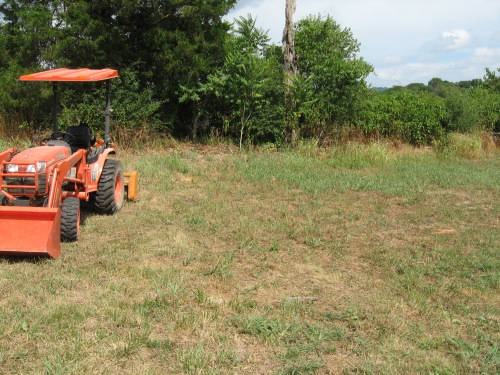
Not everyone has access to a tractor but as far as cultivating goes there probably aren't too many quicker or more efficient options.

It’s been hot lately which means the soil has been dry and easy to work, a blessing when it comes to tearing up a plot to grow a garden in.  In my experience cultivating, it is almost impossible to start upturning the earth when your working in a sticky sludgy ooze. So for a while I was playing the waiting game to actually start digging in.

Last week sometime I took advantage of the hot spell that we’ve been experiencing ( days of 90 plus) and dug in.  This time around I used a tractor to work the soil with.  I know that the goal of this garden is to show that planting can be done in a small city space and using a tractor is very counterproductive to that goal. But in the past two years I have used three different types of tools for cultivating, a tiller mounted on the back of a tractor, a Rear Tine rototiller, which is about the same size and shape of a lawnmower, and a human powered small garden cultivator.

When I was planting my home garden in Oregon earlier this year I used the small garden cultivator to tear up my 8×8 garden space and then used it again to plant 3 flats of Zinnias, but after the long days of work here in Tennessee the tractor called and I answered.

This is a rear tine rototiller. Automatic rototillers can shred the time it takes to cultivate a garden, however, this super time saver comes at a price.

Like I said though, it’s not an easy task to get a tractor in the city and especially into a community garden plot or apartment garden.  You might find a mob of people chasing you because you tore through there property to get to a spot and the 15 mile per hour max speed of the machine your using probably won’t be able to keep you ahead of the crowd for long.  You may get a few of the rioters with the front end loader but you’ll probably lose the fight ultimately. In the city the best options are rototillers and hand cultivators.

A rototiller is excellent for small to medium sized gardens.  Many are self powered and according to my uncle, the farm owner who has used many varieties of tillers, rototillers do a finer job of tilling than its cousin, the mammoth tractor.  It’d be hard however to till much more than an acre with any type of hand-pushed rototiller or even “self-powered” varieties that still require a lot of pushing and tugging to maintain a good line.

This is the down and dirty, cheap but effective manual cultivator. Running $25 this is perfect for small gardens

Small garden cultivators are perfect for the size of garden I’m working on right now.   If you don’t have room to store a rototiller or if they would cover your gardening area in a couple of pass overs with the one to two foot wide machine then I would definitely suggest using the garden cultivator.  They require elbow grease and aren’t for the lazy, but neither is gardening. A huge advantage to these types of cultivators is their price.  A small garden cultivator will run you around $25-30 dollars depending on where you shop. Even the smallest rototillers start at $200, a large investment for a micro garden.

If you are like me and trying to start a garden on a budget, then it’d be worth searching around for a friend or parent who already happens to have one of these tools around.  If all that you can get is a automatic rototiller then that seems perfect, but none of these options are terrible for borrowing.

Digging In: a crash course in gardening

  1. I chose this spot to dig in because it gets hit by sun at least 8 hours a day and was a former pasture for our chickens. Chicken poop loads soil with nitrogen and acts as a natural fertilizer. I can't gurantee the same for the human equivilent.

Three days ago I broke earth near one of our corn fields to plant a few rows vegetables in what I call the experimental garden.  The point of this garden is to show how little effort and money can be used to make a garden that will at least supplement store bought food.  Generally speaking the bigger the garden, the more food that will be produced and as a result the more money saved from not having to buy carrots and radishes at your local WINCO, or Whole foods, depending on which end of the grocery chain spectrum you come from.  But for many people, especially those who live in the city, a large garden isn’t possible.  For this reason I only made this garden 10 feet by ten feet.

The first major thing I had to do was find a spot to plant in.  From what I’ve been able to gather so far is that gardens are a bit like real estate its all about location, location, location.  You pick the wrong side of the house to plant in and you’ll find yourself with a bunch of dead seeds filling a hole in the ground, mixed with a bit of sweat.

The best places to start growing food depends on what you plant (I admittedly don’t know very much about flowers and won’t really talk about them because it wouldn’t be much more then hot air and empty print). Most vegetables enjoy a lot of sun and will fail to produce much more then disappointment if they don’t get it.  If a spot gets more then six hours of sunlight a day  it is considered Full Sun.   There are some food-plants that survive with less sun and they can thrive in Partial Sun.  A spot is considered Partial Sun if it gets between 4-6 hours of light a day. There are more than these two categories, but for vegetable gardening these are the two that are really important.

This website offers a deeper description of all the different amounts of sunlight that different plants need.

“Sun, Shade or Perhaps Something in Between”

For this project I wanted Full Sun.  I have a limited time to get from planting to harvest and need strong, fast growing plants.

Here’s a good generalized list of what plants need how much light.  This website also has a lot of insight into starting gardens in general.

http://www.colostate.edu/Depts/CoopExt/4DMG/VegFruit/muchsun.htm

I am admittedly breaking some rules in my attempt to get up quick and get out.  I have radishes, spinach, arugula, and two types of lettuce that I’m putting underground.  The lettuce will grow but this late in the season it’s going to come out bitter. However, lettuce grows quick and I have a little under 50 days here in Tennessee before I need to start cutting off heads and pulling up radish for my return trip home.

I would suggest looking up the website to some master gardeners or colleges with agriculture programs in your area to see the best times to grow in your region.  If there isn’t anything near you, or if your too eager ( I fell into this category my first time around.  I just wanted to get something in!), you can always just read the packet and get a good idea of what you can plant and when.

Tomorrow I’ll explain the process that goes into turning your ground over to get something that you can actually plant in.